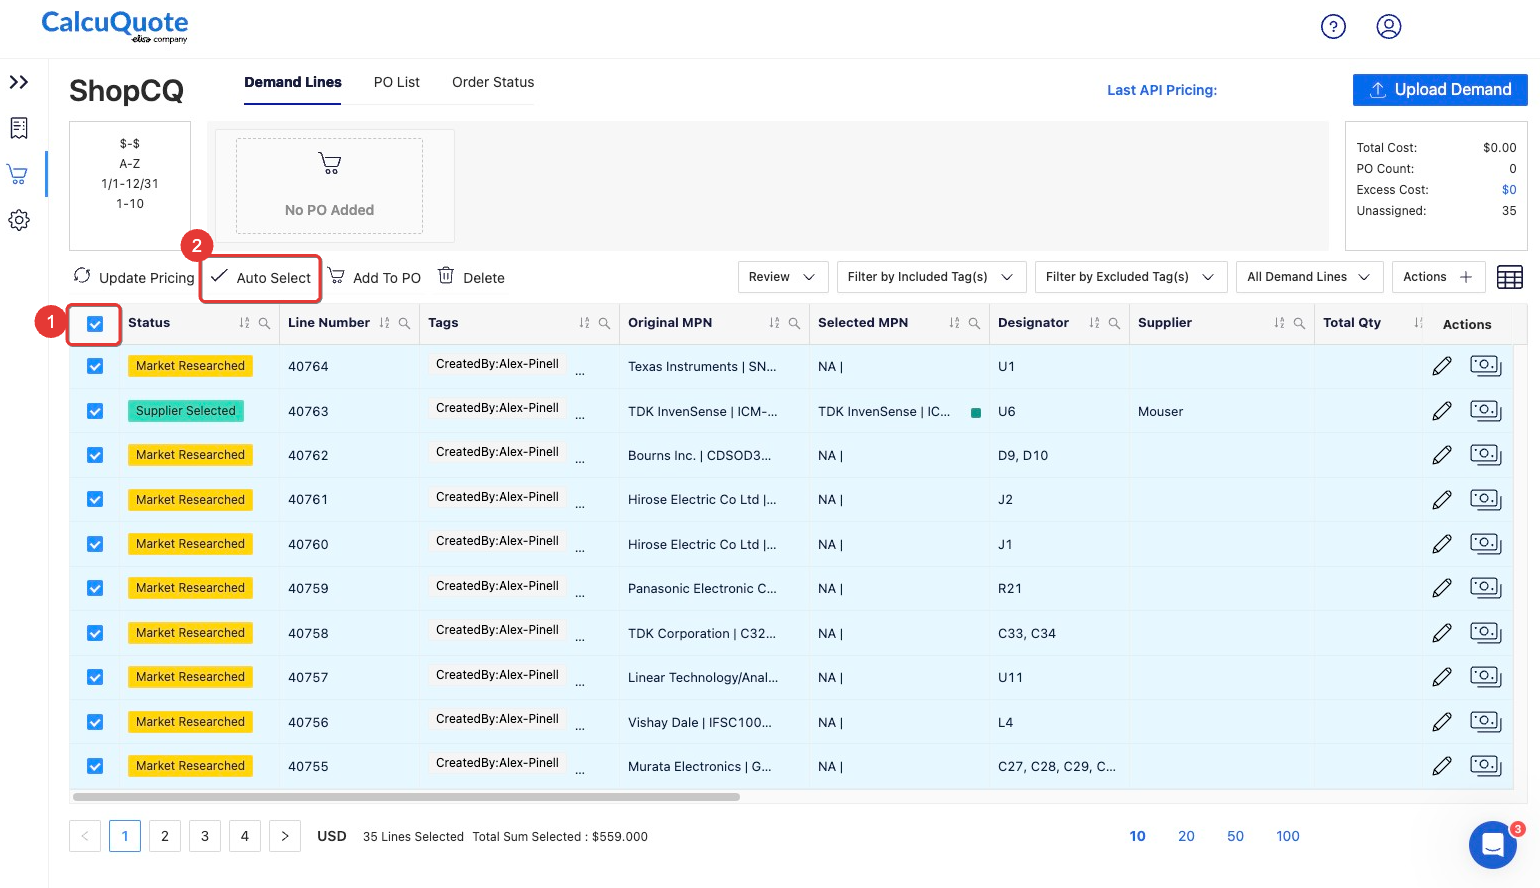
ShopCQ's Auto Select Feature allows you to select pricing quickly and easily by filtering through the pricing options available, then selecting the preferred results.
To use Auto Select, select your lines on the left hand side and click Auto Select.

Unless your pre-selects are configured, use "Advanced Options" to create your own filters.

- Advanced Options: it will be available through a drop down after clicking that button.
- Fastest Delivery and Lowest Cost: these run when the button is pressed
- These may NOT be configured for your organization. For a How-To on Configuring Auto-Select Preset buttons, click HERE.
Unless your pre-selects are configured, use "Advanced Options" to create your own filters.
Filters are used in order to determine which pricing options to consider (e.g. using Supplier Name is Equal to the chosen supplier will only consider the pricing options with the selected suppliers.) By using the 'Add Filter,' you can add another filter. Using the 'x' will remove the filter.
Preferences are used to determine which of the considered pricing options to select. (e.g. If you have multiple pricing options that are being considered from the filter(s) you have set, the preferences will determine which of those options to select.) You are able to add/remove preferences by using the 'Add Preference' / 'x' buttons.
You will also be able to save your criteria as a preset using the blue + button:
-
Click the + button.
-
Enter the name you would like to give your criteria.
-
Then use the checkmark to save.
-
Now that it has been saved, you can select the created preset from the dropdown.
-
If you would like to delete the preset, use the trash icon and it will be removed from the list.
*NOTE: You are able to have as many filters and preferences as you would like.
